@karenmpiekarski
You get this CONSOLE-LOG, when clicking onto on of the table-rows…

I gave you already the code for this action, take a look 2-3 of my post ago.
Here the working CODE one more time (for the onRow-Select-Action)…
var myDATA

export function table1_rowSelect(event) {
    console.log(event)
    $w('#BTNeditItem').enable()
    myDATA=event
}

export function BTNeditItem_click(event) {
    console.log("myDATA = ", myDATA.rowData)
    console.log("-------------------------")
    console.log("myDATA = ", myDATA.rowData._id)
    console.log("Salutation = ", myDATA.rowData.anrede)
    console.log("First-Name = ", myDATA.rowData.vorname)
    console.log("Last-Name = ", myDATA.rowData.name)
    console.log("Status = ", myDATA.rowData.status)
 //------------------------------------------------
    $w('#input1').value = myDATA.rowData.anrede
    $w('#input2').value = myDATA.rowData.vorname
    $w('#input3').value = myDATA.rowData.name
    $w('#input4').value = myDATA.rowData.status
 //------------------------------------------------
    $w('#columnStrip1').expand(), $w('#columnStrip1').show('fade')
}
You have 2-click-functions: 1) table1_rowSelect 2) BTNeditItem_click
- On first click → onto one of the many “table-rows” you get the console-log of the “click-event” (the big console-message on the beginning of this post).
There you can get all the neccassary data of the event.
Just take a closer look on it. You can recreate this console-log by your own, just run the example by yourself (while the console-window of google-chrome is opened —> F-12+CONSOLE).
in the first function a VARIABLE gets it’s VALUE after the first click was maden…
myDATA=event
The VARIABLE (“myDATA”) itself already was created right the beginning of the CODE.
Now (after the first click) “myDATA” holds the —> “event”-VALUE, a big bunch of data, which you can see in the console-log-pic.
- On second click the data of -->“myDATA”-variable is used to get all the saved row-data in this variable & pull these data into the shown INPUTS.
$w('#input1').value = myDATA.rowData.anrede
$w('#input2').value = myDATA.rowData.vorname
$w('#input3').value = myDATA.rowData.name
$w('#input4').value = myDATA.rowData.status

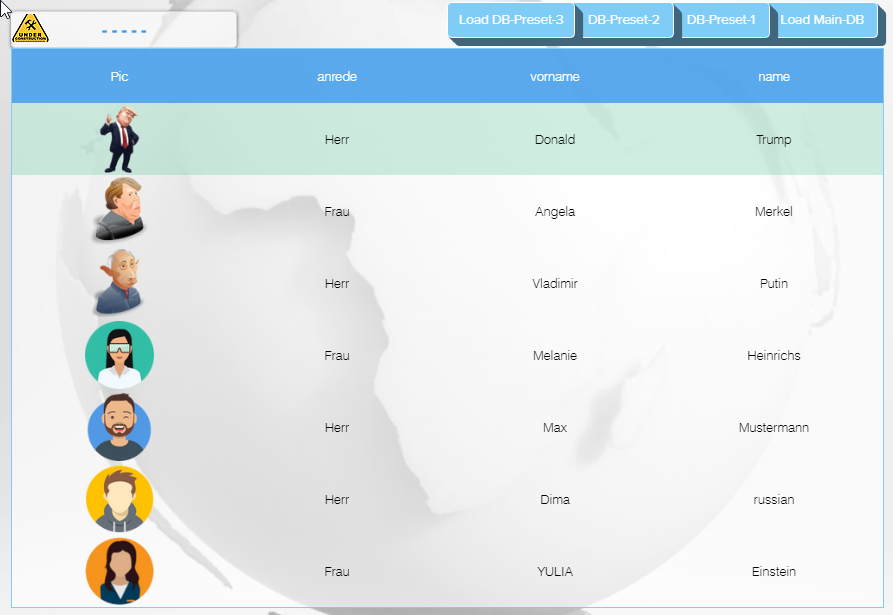
“anrede” —> “Frau”
“vorname” —> “Angela”
“name” —> “Merkel”
“status” —> “Inaktiv”
You can also open much more columns in this example, when you go to the Settings…
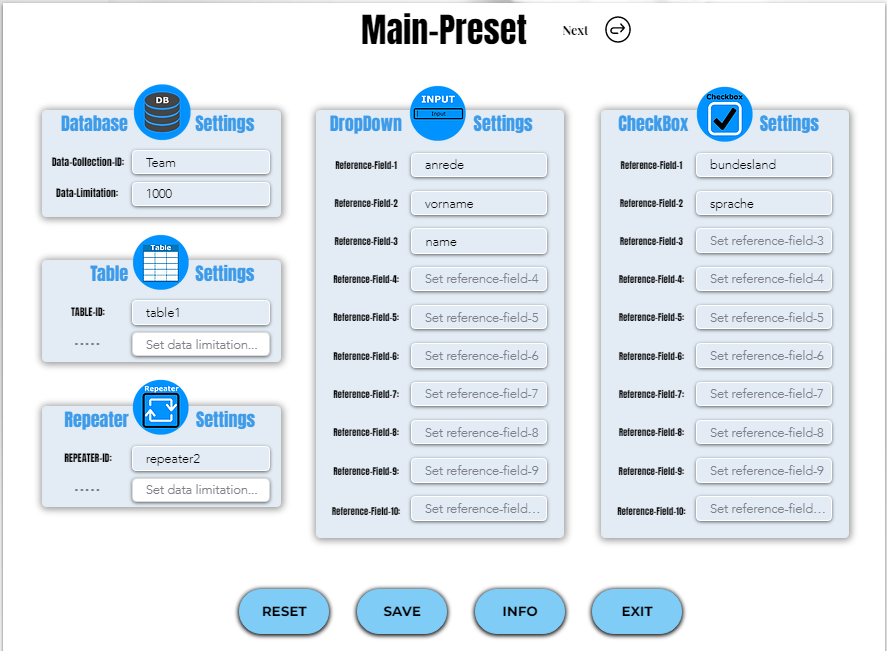
Which are your oppertunities/possibilities you will find here…
https://www.media-junkie.com/databases
There you will find the completed “Team”-DATABASE with all it’s data-fields.
To show more fields, just type in more existing column-data…
-
nationalitat
-
ausbildung
-
verfugbarkeit
-
and so on…
Put these data into the INPUTS —> DropDown-Settings (in the middle). -
sprache & bundesland are special data-fields —> selection-tags.
These ones you put into —> Check-Box-Settings (right-handed).
With these simple steps you will expand the given example.
Try it out.
