Firstly, why do you need to make the paypal button through a Wix app by POWr? You can create your own Paypal button which won’t come with any POWr branding unless you use the paid version.
https://support.wix.com/en/article/connecting-paypal-as-a-payment-provider
https://support.wix.com/en/article/adding-a-paypal-button-280640
https://www.paypal.com/us/smarthelp/article/how-do-i-create-a-paypal-button-using-the-wix-html-widget-ts2001
https://www.wix.com/corvid/forum/community-discussion/solved-custom-paypal-button-help
As for your signup page, well you can easily create your own custom signup lightbox and simply not use the link for the Login lightbox.
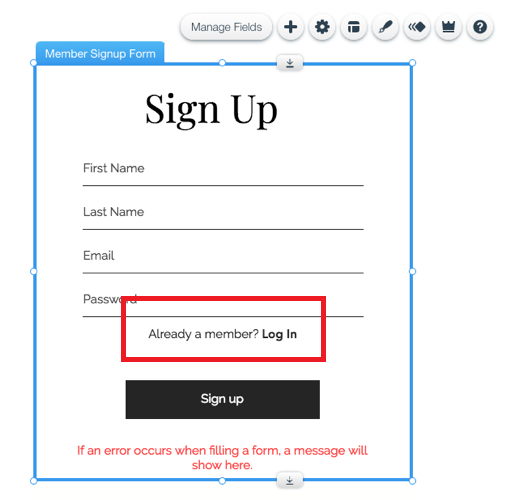
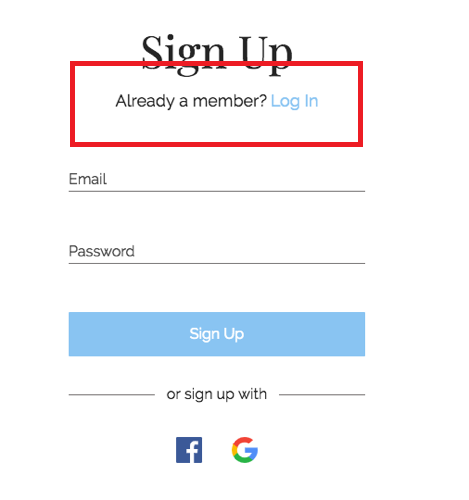
So for example, if you went with a similar design to Wix own signup forms, then you can simply just delete the marked area on both pics below which is a basic on the page link which takes you to the Login lightbox.
If you are after a already supplied version for a custom signup and login lightbox, then have a look at Nayeli (Code Queen) tutorials and videos for it here.
https://support.totallycodable.com/en/article/custom-registration-for-site-login-using-wix-code
https://support.totallycodable.com/en/article/create-custom-log-in-sign-on-screen-using-wix-code
With regards to the code, if again you don’t want to be redirected to the Login lightbox after the user Signs up, then simply delete this line of code from the site login code tutorial.
wixWindow.openLightbox("login");
//if you want to move user onto another page after signup is successful, then simply use this...
wixLocation.to("/yourpageURLhere");  //Change the URL ending to whatever page you want to send the user to after they log in.
The same with the redirection for the Sign On tutorial
You can simply change the wixLocation.to command to go to whatever page you require.
wixLocation.to("/account/my-account"); //Change the URL ending to whatever page you want to send the user to after they log in.
Obviously you will need to set up manual approval for your signup if you are wanting to manually approve members yourself.
Who can be a member?
Choose who can be a member of your site:
-
Everyone: When a new member signs up, they are approved automatically. You do not need to do anything.
-
People I approve: When a new member signs up, you receive a notification, both by email and in your site’s dashboard, asking if you want to approve or reject them. Only those who you approve become site members.
Which option shows first?
Choose which option appears first in the signup window:
-
New member signup: The signup option is displayed first.
-
Existing member login: The login option is displayed first.
Site Members: Editing Your Member Signup Settings for the Default and Custom Forms | Help Center | Wix.com
You can also see a Wix tutorial here about setting up your own custom signup lightbox.
Velo Tutorial: Creating a Custom Registration Form with Code | Help Center | Wix.com
However, you will need to set your Member signup settings to suit it too.
Velo: Enabling Custom Site Registration | Help Center | Wix.com
Once you have setup manual approval with the Signup lightbox, you can either keep the user on the same page or direct them back to your home page or a awaiting approval page for example.
Then you can simply use Wix Automations to send them a email once they get approved by yourself.
Wix Automations | Help Center | Wix.com
For Members only page you can use this tutorial as an example for a members profile page. It uses dynamic pages so that they are unique to each member and only accessible by that specific user.
Velo Tutorial: Building Your Own Members Area | Help Center | Wix.com
You can change this tutorial to whatever you wish, you don’t have to keep it the same, it is just there as an example of what can be done.
You can add on this Wix Automation email the url address for your Member profile page on which you can have your Login lightbox popup only instead of your Signup lightbox.
So once you approve a member they will receive an email stating that they are now a site member and can access your site etc.