Question:
How can I highlight a word in a paragraph
Product:
Wix Studio Editor
What are you trying to achieve:
I’d like to highlight a specific word within a paragraph or an H2 tag, without using an embed code — that feels like overkill for this purpose. I already have the HTML and CSS needed to style the text, but I’m not sure of the best way to implement it within Wix. Any guidance would be greatly appreciated!
What have you already tried:
I’m new to Wix, and I was surprised to discover that I can’t edit the source code directly. While I understand it’s designed as a no-code/low-code platform, I didn’t expect that I wouldn’t be able to apply basic HTML tags around individual words. From what I’ve read, the typical workaround is to use an Embed Code element — but since that creates an iframe, I’d prefer not to clutter my page with multiple embeds just to apply simple styling.
Additional information:
This is what I would like to achieve
Example
Although it’s not exactly the style I’m looking for but it’s just an example of how I would write the HTML code.
https://codepen.io/alvarotrigo/pen/dyJbjMX
You have several options!
- You do use global CSS-Styling, but this will not really help you much → because like already said → global css ← which will set all text of the chosen styling.
something like…
.rich-text {
    color: orange;
    background-color: yellow;
    font-family: 'CustomSerif', serif;     /* font-face */
    font-weight: bold;
    text-decoration: underline dotted rgb(23, 141, 159); /* text-decoration */
    text-align: left;
    text-shadow: 1px 1px 2px rgba(0,0,0,0.5);
}
- You can use the normal text-element but as html version…
…something like …
$w.onReady(function () {
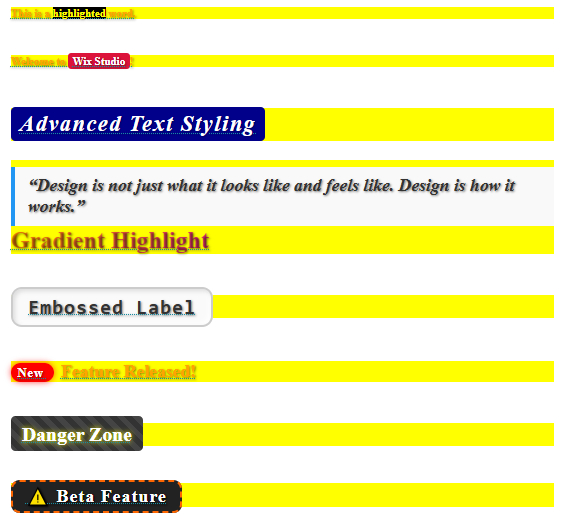
$w("#txt1").html = `This is a <span style="color: yellow; background: black;">highlighted</span> word.`;
$w("#txt2").html = `Welcome to <span style="color: white; background-color: crimson; padding: 2px 4px; border-radius: 3px;">Wix Studio</span>!`;
$w("#txt3").html = `
<span style="
font-size: 20px;
font-weight: 600;
font-style: italic;
color: white;
background-color: darkblue;
padding: 4px 8px;
border-radius: 4px;
line-height: 1.5;
text-shadow: 1px 1px 2px rgba(0,0,0,0.3);
letter-spacing: 1.5px;
">Advanced Text Styling</span>
`;
$w("#txt4").html = `
<span style="
font-size: 16px;
color: #333;
background-color: #f9f9f9;
border-left: 4px solid #2196F3;
padding: 8px 12px;
display: inline-block;
font-style: italic;
margin-top: 6px;
">“Design is not just what it looks like and feels like. Design is how it works.”</span>
`;
$w("#txt5").html = `
<span style="
color: transparent;
background-image: linear-gradient(to right, #ff8a00, #e52e71);
-webkit-background-clip: text;
background-clip: text;
font-weight: bold;
font-size: 22px;
">Gradient Highlight</span>
`;
$w("#txt6").html = `
<span style="
background-color: #fafafa;
border: 2px solid #ccc;
color: #333;
padding: 6px 14px;
font-size: 18px;
font-family: monospace;
font-weight: 600;
box-shadow: inset 2px 2px 4px #ddd, inset -2px -2px 4px #fff;
border-radius: 10px;
letter-spacing: 1px;
">
Embossed Label
</span>
`;
$w("#txt7").html = `
<span style="
background-color: red;
color: white;
font-weight: bold;
padding: 2px 6px;
border-radius: 12px;
font-size: 12px;
box-shadow: 0 0 6px rgba(255,0,0,0.7);
letter-spacing: 0.5px;
">
New
</span>
<span style="font-size: 16px; margin-left: 6px;">Feature Released!</span>
`;
$w("#txt8").html = `
<span style="
color: #fff;
background: repeating-linear-gradient(
45deg,
#444,
#444 5px,
#333 5px,
#333 10px
);
padding: 6px 10px;
border-radius: 4px;
text-shadow: 0 0 5px #ff0;
font-size: 18px;
font-weight: bold;
">
Danger Zone
</span>
`;
$w("#txt9").html = `
<span style="
position: relative;
padding: 4px 12px;
font-size: 16px;
font-weight: bold;
color: #fff;
background: #222;
border: 2px dashed #ff6600;
border-radius: 8px;
letter-spacing: 1px;
text-shadow: 1px 1px 2px #000;
">
⚠️ Beta Feature
</span>
`;
});
Which will result in something like …(or other stylings…)
- Furthermore you can use HTML-Components, like you already told.
- Furthermore you can use → CUSTOM-ELEMENTS (also overkill).
- Furthermore you can try to use CUSTOM-CSS.
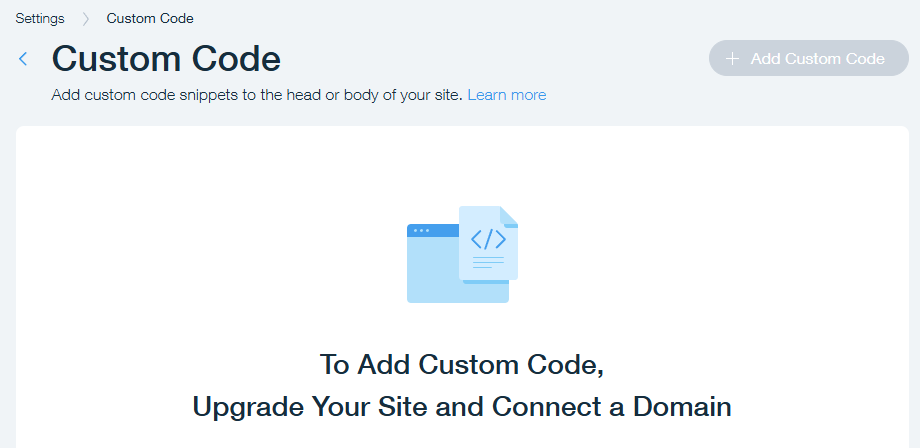
- Furthermore you can try go directly onto your CUSTOM-CODE-OPTIONS inside your DASHBOARD and try it there…
@CODE-NINJA thanks for sharing these detailed examples — really helpful!
- Option 2, isn’t ideal, since I’d need to teach the user how to make those changes, and there’s a high chance they might break something.
- Option 4, using custom CSS, would’ve been perfect — but the main issue is still figuring out how to target the exact element where the style should apply.
- Option 5 would require an upgrade, and even then, the challenge of identifying the right target remains.
You could do something with flexbox, similar to what we have on the Studio Community landing page.
Each text is added to it’s own item container within the flexbox component, allowing you to add whatever else you need to that container. In your case, the “doodle” background.
Image to demonstrate how we’re using the flexbox.a
Only tradeoff with this, is each text is split - however search engines will generally do a good job of understanding the content forms a complete sentence
@noahlovell thanks for the suggestion. That said, it still feels like an excessive amount of work for something so basic. Even with this approach, I wouldn’t be able to achieve exactly what I need. Looking at the Studio Community landing page, each word and underline is treated as a separate div, which means I can’t apply a global, generic style.
I really hope Wix considers adding a fundamental feature like source text editing. While I understand it’s a no-code/low-code platform, we still need the flexibility to deliver what the client wants — and right now, that’s not possible.
Thanks again to everyone for your advice and input.