Integration of external scripts with fixed container IDs in Wix Live

Hello,

I am trying to integrate an external 3D configurator on my Wix site using the old Wix Editor (not Wix Studio). The script requires a fixed container with a specific ID (example-container).

Problem:

  • In the Editor, I can assign the desired ID to the box.

  • In Live mode, Wix automatically changes the ID (e.g., comp-mf9h5875).

  • The external script then tries to find the container with the ID example-container but cannot, so the UI does not render.

  • Even when dynamically inserting the script via JavaScript after window.onload, the container is not recognized correctly.

  • In the browser console, I see the message:

    Bootstrapping app module for target #example-'container'...


    It appears that the ' is automatically added, making the container selector invalid.

Additional issue:

  • Using an iframe is not an option, because the configurator needs to interact directly with the Wix shopping cart and pass data such as containerId.

  • Therefore, the container must exist in the same DOM as the page.

Questions:

  1. Is there a way to assign a fixed ID to an HTML element in Live mode without Wix automatically changing it?

  2. If not, what best practices do you recommend for integrating external widgets/apps with fixed container IDs in Wix that need to interact with the live DOM (e.g., for shopping cart events)?

  3. Would you recommend using HTML-embeds as the only practical solution, or is there a way to implement this reliably via Velo code?

Thank you very much for your support!

First of all let’s clarify things!

1) What WIDGET are we talking about ?

2) How do look like its EMBED-CODE ?

3)

I am trying to integrate an external 3D configurator on my Wix site using the old Wix Editor (not Wix Studio) . The script requires a fixed container with a specific ID (example-container ).

What element exactly did you try?
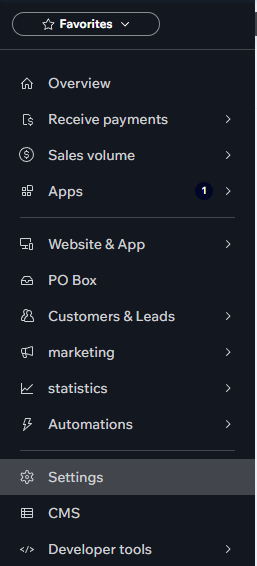
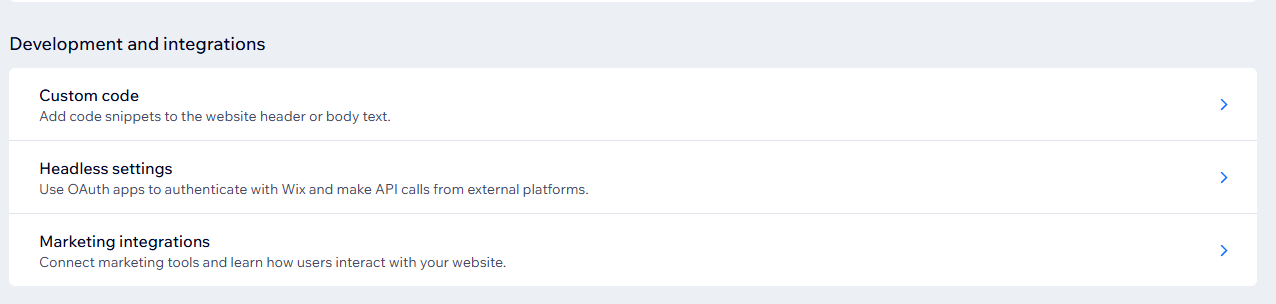
a) Directly on Wix-Page (Dashboard-Settings) → CUSTOM-CODE ?
b) HTML-Comp (probably won’t work) like you already recognized the culprit/bottleneck.
c) What about → CUSTOM-ELEMENT ???

4) Which possibilities else do we have?
Well this will depend on your external provider.

a) Only EMBED-WIDGETS → PROBLEMATIC-BOTTLENECK???
b) API -SUPPORT ??? → using VELO-API ???
c) Maybe even NPM-SUPPORT? → installing customers NPM on Wix-page ???
d) Working over http-requests / http-functions / queries ?
e) REST-API-SUPPORT ??
f) Wix-SDKs ???
f) Webhooks

So, it will also depend a lot onto your external provider (3.-party).

  • :grin:HACK-MODE-ACTIVATED

!!! Now let’s go into details !!!

You’re running into a known limitation of Wix’s old Editor:

Wix does not allow fixed HTML IDs on live pages. Even though you can set an id in the editor, Wix replaces it at runtime with a generated ID like comp-mf9h5875. This is done to prevent conflicts between apps and widgets.

However, there are workarounds to integrate an external 3D configurator that requires a fixed container ID.


Your aim:

You want to embed an external 3D configurator into your Wix site, without using an iframe, so that it:

  1. Renders directly inside the Wix page DOM in a fixed container.
  2. Has a stable, predictable container ID (e.g., example-container) that the configurator can target.
  3. Can interact directly with Wix features, especially the shopping cart, to:
  • Send product customization data (colors, sizes, etc.).
  • Trigger Wix cart updates programmatically.
  1. Works seamlessly in live mode, not just in the Wix Editor preview.

Your problem:

  • Wix wraps all elements in a shadow DOM-like structure.
  • The ID you set in the editor (example-container) is only for the editor, not the live site.
  • At runtime, Wix generates unique IDs (comp-xxxxxxx) for every element.
  • This means any external script that directly uses #example-container will fail because that element never exists in the published DOM.

.
.
.
But like i always like to say: !!! Where there’s a will, there’s a way !!!

1. Possible-Workaround: Setting the fixed ID dynamically (not tested)

You can try to use Velo (Wix Code) to assign the correct fixed ID dynamically after the page loads.

Steps:

  1. Give your container a Wix ID in the editor (e.g., configuratorBox).
  2. Add this Velo code to your site:
$w.onReady(function () {
  // Dynamically assign fixed ID
  const wixBoxId = "#configuratorBox";
  const fixedId = "example-container";
  
  setTimeout(() => {
    const element = document.querySelector(`[data-testid="configuratorBox"]`) || document.getElementById($w(wixBoxId).id);
    if (element) {
      element.setAttribute("id", fixedId);
      
      // Initialize the external 3D configurator
      initConfigurator({
        containerId: fixedId,
        onComplete: (configData) => {
          // Add to Wix cart when configuration is done
          import('wix-stores').then(({ cart }) => {
            cart.addToCart({
              productId: configData.productId,
              quantity: 1,
              options: configData.options
            });
          });
        }
      });
    }
  }, 100);
});

Did you belive into this b_ _ _ s _ _ _-code (generated by an AI)?

!!! ME NOT !!! :grin:

Well this of course won’t work !!!

But wait, there is maybe light at the end of the tunnel…

What about …

… and …

… well even the mentioned Webhooks included…

And this is surely only one of possible working solutions and if you give more efforts to search for more information, you will find even more possible solutions!!!

Check all your possibilities!!! (provided by Wix and your 3.-party)

And by the way, a → CUSTOM-ELEMENT ← should also work for you, i asume a → 90% success-rate, if you will use it.

Hi!

Thanks for your reply, here are my answers:

  1. Widget: It’s an external 3D configurator.

  2. Embed code: Requires a fixed <div id="..."></div> container + a script.

  3. Tried so far:
    a) Custom Code → added, but doesn’t work.
    b) HTML Component → tested, but runs in an iFrame (not usable).
    c) Custom Element → currently in use.

  4. Status:

    • With Custom Element, the div and script are created and loaded.

    • Problem: Container + script do not appear in the static page source, they are injected later → the configurator does not recognize them.

Current issue: I need a way to have the container with a fixed ID appear directly in the static page source.

**How did you do that exactly??? **
You do not provide details!!!

However try the following …

1) Open Website-Settings

2) Navigate to OPTIONS / SETTINGS (on very bottom)

3) Look for → CUSTOM-CODE ←

4) CUSTOM-CODE-DIALOGE appears…

  1. FOLLOW INSTRUCTIONS (to be seen on the IMAGE) + the following CODE…
<div id="myConfigurator"></div>
<script>
  console.log("[Configurator Test] Script loaded");

  setTimeout(() => {
    const container = document.getElementById("myConfigurator");
    if (container) {
      container.innerHTML = "<h2 style='color: green'>Configurator Loaded Successfully ✅</h2>";
      console.log("[Configurator Test] Found container and initialized.");
    } else {
      console.error("[Configurator Test] FAILED ❌ - No container found at load time!");
    }
  }, 200);
</script>

6) Click onto → APPLY ←
2025-09-08 22_33_15-Settings _ Wix.com

7) Publish your website.

8) Check results!

Now, you should get something like ....


…in the top left corner on your webpage.

Since you do not provide any real informative facts about the widget you are using or even directly the code, i can provide you only this example.

What This Confirms

  • :white_check_mark: If you see green text and the success log, your Wix placement is correct.
  • :cross_mark: If you see a failure, the <div> is still not part of the static HTML, and your real configurator won’t work yet.

Once this test passes, replace the test <script> with your real configurator script URL:

!!! Good luck !!!

EDIT:

Now to test it further → remove the STATIC-CONTAINER →
<div id="myConfigurator"></div>
Publish and test again! What do you get ?

Not showing up anymore, because container is missing?
2025-09-08 23_12_08-Login-Management _ WixWorld


Pay attention where the CUSTOM-CODE-SCRIPT is located at and where is located all the injected Wix-Code-Part!!!

You also can remove the → setTimeOut ← completely and try again.

And tell me your results.

**

EDIT: Ok, one last info for you…** :grin:

You can SIMULATE YOUR SITUATION ALSO INSIDE OF → JS-Fiddle ←

.
1) Navigate to → JSFiddle official website.
2) Paste the following code into the HTML-Section..

<!DOCTYPE html>
<html lang="en">
<head>
  <meta charset="UTF-8">
  <title>Configurator Test</title>
</head>
<body>
  <h1>Configurator Test</h1>
  <p>This page simulates a configurator that requires a static container.</p>
  <div id="myConfigurator"></div>

  <!-- Uncomment the next line to test the working static setup -->
  <!-- <div id="myConfigurator"></div> -->

  <!-- External script (Configurator) -->
  <script>
    (function() {
      console.log("[Configurator] Script loaded");

      // Simulate external initialization
      setTimeout(() => {
        const container = document.getElementById("myConfigurator");
        if (container) {
          container.innerHTML = "<h2 style='color: green'>Configurator Loaded Successfully ✅</h2>";
          console.log("[Configurator] Found container and initialized.");
        } else {
          console.error("[Configurator] FAILED ❌ - No container found at load time!");
        }
      }, 200);
    })();
  </script>

  <script>
    // Simulate Wix injecting the container dynamically
    setTimeout(() => {
      const lateDiv = document.createElement("div");
      lateDiv.id = "myConfigurator";
      lateDiv.innerHTML = "<p>Injected too late!</p>";
      document.body.appendChild(lateDiv);
      console.log("[Wix Simulation] Container injected dynamically.");
    }, 1000);
  </script>
</body>
</html>

3) Run the script!!!

WHAT DO YOU SEE???

4) Now remove → <div id="myConfigurator"></div>
5) Try again !!!
6) What do you get?

And by the way about… —>

Wix does not allow fixed HTML IDs on live pages. Even though you can set an id in the editor, Wix replaces it at runtime with a generated ID like comp-mf9h5875 . This is done to prevent conflicts between apps and widgets.

—> with a generated ID like comp-mf9h5875 <—

There are those IDs…

Take this as additional information:
https://www.youtube.com/watch?v=0BLakHryMWI

Hi,

sorry for the late reply! I’ve tried multiple approaches and want to summarize clearly using dummy/example data (no sensitive info).

  1. Static div requirement
    The script requires a fixed div in the HTML source, e.g.:
<div id="example-container"></div>

The script cannot use a different ID and only works on our domain, so JSFiddle tests aren’t useful.

  1. What I’ve tried
  • Custom elements / custom code in Wix: creates div dynamically but cannot place it in a specific section/box; shows only a white container.

  • setTimeout hacks: work in isolated HTML tests, not in Wix due to ID rewriting.

  • Embedding scripts in boxes/sections: Wix resizes or resets the div, breaking initialization.

  1. Observations
  • Your test code shows the div only top-left, not where I need it.

  • Wix old editor rewrites IDs like comp-mf9h5875, so fixed IDs aren’t preserved.

I’ve tried everything I could think of, but the combination of custom elements + Wix’s ID rewriting + domain restrictions makes it impossible for me to get it working alone.

I’ve also sent you an email. I would really appreciate your personal guidance on how to get this working in the old Wix editor.

Thanks a lot!

Ok, i got your email and cheked your concerns, i understand.
I can’t help you directly at the moment; you’ll have to wait until the weekend (due to time constraints) → already working on other code-projects.

But if you can wait till weekend, i can directly take a look onto your setup (you can later invite me to your project (this offer is free).
I would take a look directly onto the exact existing codes and issues → this way it is much easier to detect issues, bugs and errors, or solutions.

Don’t send me the invitation yet, wait until i am back on (about friday or saturday).

And in the meanwhile, maybe you will already get it to work on your own. :wink:

I will contact you back (either here or private).

Next time you also can use the → MESSAGE ← feaature of this forum to contact me directly, i do check my messages frequently here in this forum (even more then my own emails xDDDD) :wink:

OKEEEEEEEEY!!! → NO NEED TO WAIT ANYMORE TILL WEEKEND!

Here comes the prove that my theory is working just fine!!!

The setup:

You can create your own little 3-rd. party service with → JSONBin.oi
How to do so?

Step-1: Navigate to → https://jsonbin.io/
Step-2: Create an account (free).
Step-3: Create a new bin like shown on the following pic…

Step-4: Paste the following code into the BIN-CONTENT…

{
  "message": "Hello from External Service!",
  "value": 0,
  "timestamp": "2025-09-09T15:00:00Z"
}

It will look like →

Step-5: You will get a → BIN-ID ← which will look like …

Step-6: Now you will also need an API-KEY, which you also can generate on your own, what will look like —>

You now will have the following ingredients:

    1. A bin with some data
    1. A BIN-ID
    1. A bin API-KEY → (only for specific BINs)
    1. A MASTER-KEY → (can open all of BINs)

For your own testing purposes → use → MASTER-KEY <— this key will open any BIN → so you won’t have much troble about API-KEY injection.

And here comes the main part → some specific code made by CN (who is CN) ??? :grin:

CN-CODE:

<div id="myConfigurator"></div>
<script>
(function(){
  const containerId = "myConfigurator";
  const binId = "68c06200....f4077...c3";
  const masterKey = "$2a$10$8R5qke...RJH...TEgO...gsdQbDZy...cBE6hRkdy";

  function getContainer() {
    return document.getElementById(containerId);
  }

  async function fetchMessage() {
    const container = getContainer();
    if(!container) {
      console.warn("Container #" + containerId + " not found yet. Will retry...");
      return;
    }

    try {
      const res = await fetch(`https://api.jsonbin.io/v3/b/${binId}/latest`, {
        headers: { "X-Master-Key": masterKey }
      });

      if(!res.ok) {
        console.error("Fetch failed:", res.status, res.statusText);
        container.textContent = "Error fetching message";
        return;
      }

      const data = await res.json();

      if(!data || !data.record) {
        console.warn("No valid record in JSONBin response:", data);
        container.textContent = "Waiting for data...";
        return;
      }

      const record = data.record;
      container.textContent = `Message: ${record.message ?? "N/A"} | Value: ${record.value ?? "N/A"} | Time: ${record.timestamp ?? "N/A"}`;
    } catch(err) {
      console.error("Error fetching message:", err);
      const container = getContainer();
      if(container) container.textContent = "Error fetching message";
    }
  }

  // Retry fetching every 5 seconds
  setInterval(fetchMessage, 5000);
  fetchMessage(); // initial attempt
})();
</script>

This code will go to your CUSTOM-CODE inside your Wix-Dashboard-Settings:


Exactly the same way like shown → because i tested it already on my site and it was working → !!! PERFECTLY !!!

Now where to pay attention on?

As you can see i used the → STATIC-DIV ← called → “myConfigurator”
Removing this static div should break this whole setup and the embed will stop working.
As long as the static div is provided → you will recieve messages (the messages from your BIN, you generated just minutes ago)!

So, just right now → you generated your own 3rd.-party-service, which sends DATA from an external site to wix (well not completely correct → it fetches <–, but should be still the same.

The endresult???
Take a look here …
2025-09-09 20_21_46-Window
Getting the message on my Wix-Site…
2025-09-09 20_22_41-Window

YOU REMEMBER???

It will work the same in your case, but instead of fetching it will push and recieve data.

If i find some time, i will demonstrate you also a REAL-PUSH-BASED-EXTERNAL-SERVICE, which will push data (send) and your plugin will only revieve, something like the following EMBED-SETUP…

<script>
(function(){
  const containerId = "myConfigurator";
  const container = document.getElementById(containerId);

  if(!container) {
    console.error("Container #" + containerId + " not found");
    return;
  }

  const evtSource = new EventSource("https://your-flask-server.com/stream");

  evtSource.onmessage = function(event) {
    try {
      const record = JSON.parse(event.data);
      container.textContent = `Message: ${record.message} | Value: ${record.value} | Time: ${record.timestamp}`;
    } catch(e) {
      console.error("Invalid SSE data", e);
    }
  };

  evtSource.onerror = function(err) {
    console.error("SSE error", err);
  };
})();
</script>

You even can do it on your own, but this will need some more coding work.

Ingredients:

  1. INSTALLING → PYTHON on your local machine.
  2. Creting a --------> FLASK-SERVER
  3. Eventually installing some dependencies.
  4. Running the SSE-CODE on your flask-server.
  5. Pasting again the shown EMBED-SCRIPT onto your Wix-Site.
  6. Running your Flask-Server and the SSE-MODE.
  7. Push notifications starts!!!
  8. Now you can check if you will get your notifications on wix-site.

In this setup → everything should work → onMessage <—

evtSource.onmessage = function(event) {
    try {
      const record = JSON.parse(event.data);
      container.textContent = `Message: ${record.message} | Value: ${record.value} | Time: ${record.timestamp}`;
    } catch(e) {
      console.error("Invalid SSE data", e);
    }
  };

I will try, but i think this one really needs your expert eyes :sweat_smile:. In the meantime, I guess I’d better roll up my sleeves and start migrating to Wix Studio, lol. Honestly, no rush at all. I’d just be super grateful if you could take a look whenever you have the time. Thanks a ton for all your help so far

I might have completely missed something in the conversation :sweat_smile:

Within Wix/Studio, you can’t work directly with the DOM - unless via Custom Code added via the dashboard or using a Custom Element.

I’m curious what prevents you using a Custom Element? Can’t you create an element in the Custom Element with a fixed id? (Since you created it within the Custom Element, it shouldn’t have a new ID assigned)

Something like:

class ExampleContainer extends HTMLElement {
  constructor() {
    super();

    const shadow = this.attachShadow({ mode: "open" });

    const container = document.createElement("div");
    container.id = "example-container";
    container.textContent = "Hello from Example Container";

    const style = document.createElement("style");
    style.textContent = `
      #example-container {
        background-color: lightblue;
        color: black;
        padding: 1rem;
        border-radius: 8px;
        font-family: sans-serif;
      }
    `;

    shadow.appendChild(style);
    shadow.appendChild(container);
  }
}

customElements.define("example-container", ExampleContainer);

Hi!

I managed to create the div in the live DOM (inside of the custom element) but not in the source code (CTRL + U) and the script requires it in the source code..

I will try your code in the dashboard. But how can i define the position? I would like to place it inside of the first section of the site or in a custom element. But it has to be in the DOM (not live dom).

Problem already solved ?

By the way → you got an e-mail.